
Home » Basics & Install
Because knowing is half the battle…

Where to Start
You have your plan…now what?
Undo what’s been done
Demo time! If removing large trees, get some help (see Who’s Who below). If you have bermuda grass or nut sedge…be prepared to spend a good amount of time eradicating before you can even start.
Ways to get rid of these:
– Solarize, this must be done in the summer. Scalp (cut as short as possible), water, then cover with clear UV resistant plastic (so it doesn’t break down) making sure there is no air flow and leave for 6-8 weeks.
– Dig, for very small areas I have done this effectively. You will not get it all the first time as any small rhizome left will grow, but it can be done
– Spray, my least favorite option, but sometimes necessary…and the sooner you do it the better…before it spreads even more. Glyphosate (Roundup) will kill bermuda grass if done right. Spray during the growing season (summer) and make sure it is growing (water it). It may take a few applications, but if done right the amount will decrease significantly. Am looking into another option that may be more environmentally friendly. If spraying around/over existing ornamentals try Ornamec (am currently trying so will share results soon).
Sedgehammer works on nut sedge but, like glyphosate, will kill other plants, so use carefully.
Start at the bottom
Unless you have demo work to do, the first place to start is the ground…literally. Grading is the very first thing to address. If you will be adding retaining walls then irrigation and other wiring/plumbing will be intermixed with this step. Be sure to do all of your grading for water catchment at this time too.
Underground work
Irrigation, wiring, etc. Things that need to gone under…
Hardscapes
Pavers, concrete, etc.
Plant
Remember, plant “proud”, you don’t want your plants trunk to be the place water collects or it will rot out and die. Also, plant for full growth…if your little 1 gallon plant will grow to be 6 feet in diameter give it room to do so without suffocating other plants.
Weed block
If using weed block…you can put this down first then cut holes to plant if you are using a roll out kind, but cardboard and newspaper really lend to doing after planting.
Mulch
Be sure to keep mulch a safe distance from the base of plants and trees. Mulch touching them can cause rot and other diseases.
Final touches
Add the little decorations you want, pots, etc.Check your watering
Use a moisture meter to make sure plants are not too wet (or completely dry). Drought tolerant plants need frequent watering the first month or so, but once they start holding water be sure to cut back and water less (see Watering Tips & More below)
Enjoy!
The work is never really done, all plants need some care, but at this point the worst is over and you get to sit back and enjoy your hard work and the regular maintenance should be a pleasure 🙂

What Will It Cost
While doing it yourself does mean money saved on labor (which can be 50-100% of your material costs) it still adds up. When I design for you I design what you want, then we talk about money saving alternatives. Below are some standard costs, and standard alternatives.
Weedblock – FREE
I recommend using cardboard. Remove all tape/staples and make sure it overlaps by ~6″. Water it down before spreading mulch. This should last at least 1-2 years pending weather/rain. In my experience by the time it has broken down you will have little weed issue as the mulch does the rest. Though you may have to add mulch as it breaks down (assuming you are using bark/wood chips). I have also used 100% cotton sheets, newspaper, paper bags, etc. All worked pretty well.
Do NOT use the black weedblock! Unless it says it is made from corn or other natural resources it is a version of plastic and will NEVER biodegrade, just break apart and be in your yard…forever.
Nothing blocks out bermuda grass or nutsedge…sorry, I feel your pain.
Mulch – $0.50/sf and up
This is wood chips and/or rock. Average cost is about $50/yard, but can go up to $100+/yard for specialty rock. For $50/yard @ 3″ deep estimate $0.50/sf.
Where to buy – I suggest Rosenbalm Rockery. They have a good selection and deliver for free if you order more than 12 yards and live within the Madera/Fresno/Clovis area.
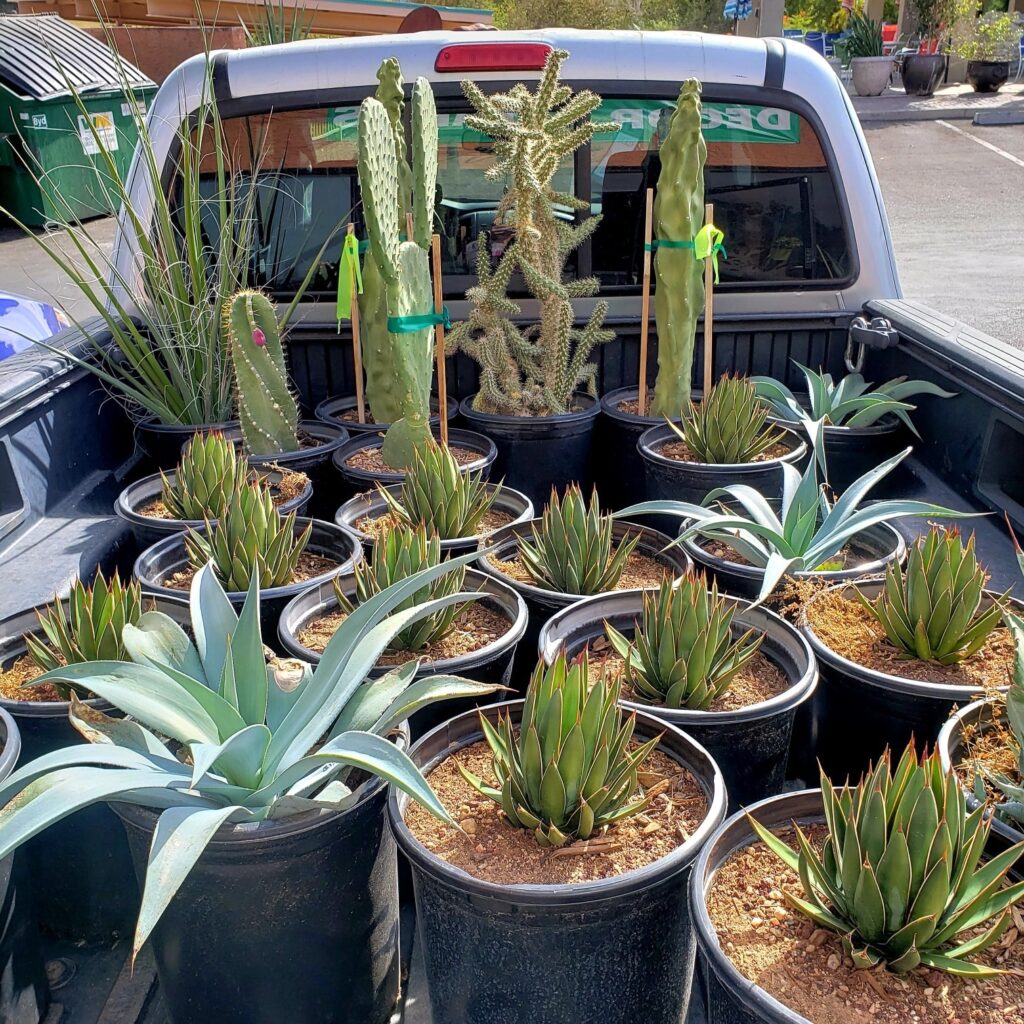
Plants – $1.25/sf (does NOT include trees)
This is based on buying 1 gallon plants with the average plant getting 3′ wide and costing $9, obviously size and cost vary, but this is the middle ground. If you are going for a more sparce planting multiply by the percentage of coverage you are going for (e.g. 50%). If you are planting 5 gallon plants figure $25/plant, or $3.50/sf. I usually recommend 1 gallon plants as shrubs grow pretty quickly and difference in size is usually a year.
Trees can be averaged at $50/5 gallon or $100/15 gallon. I like 5 gallon trees as they grow better (straighter, stronger, etc.).
Irrigation – Varies, not my field
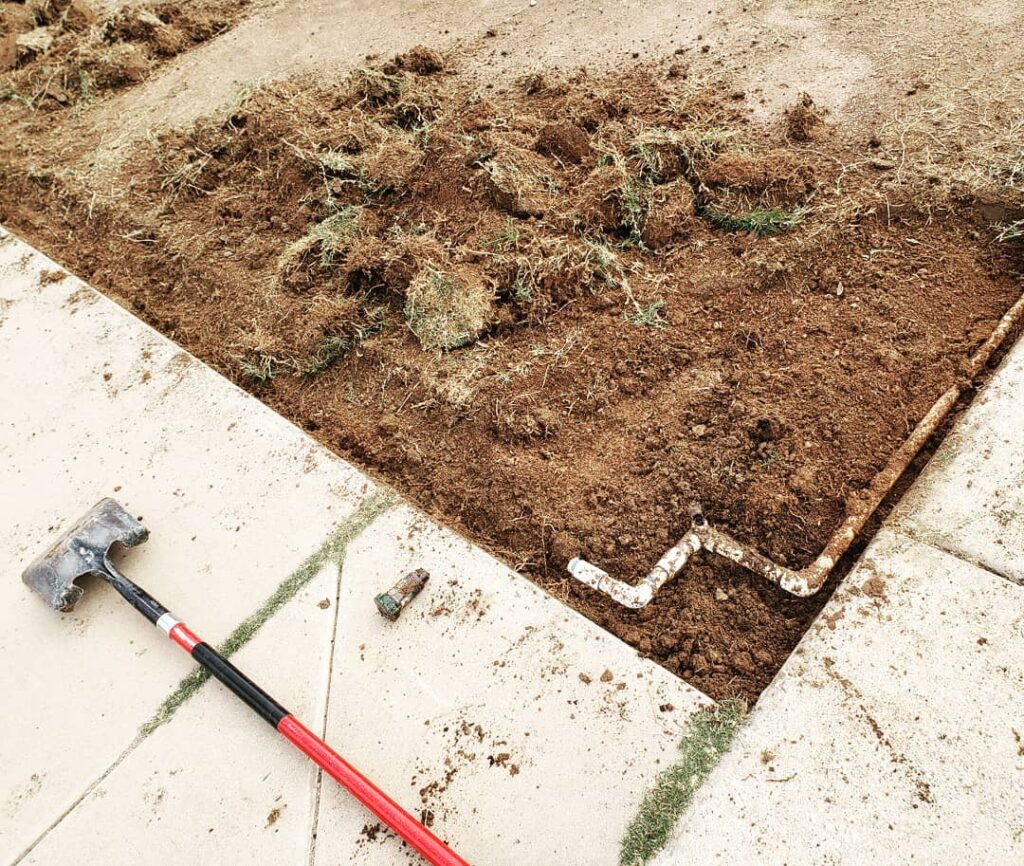
If you are wanting to do a small area and not do a full hard-lined system my “Ghetto Girl” method works (see image at right). The parts can all be bought at Ewing Irrigation (they actually know what they are talking about and are very helpful if you have some time and patience, homeowners are not their target market). Two locations, North Fresno and Clovis area. This method will cost $100-200 (more pending the length of tubing). Remember, you can only get so much water out of hose…so may need multiple stations…and trees should get their own line.
As for installers, I do not have licensed recommendations at this time
Watering Tips
- Plant same water use plants next to each other. You will drown low water use plants if you place them next to water loving plants.
- Water deep. I can never stress this enough. Get a probe so you can check your water depth (a long screw driver is a good start).
- Get a moisture meter. I am guilty of seeing my plant look sad and deferring to watering it before checking, only to have done more damage because it was already water logged.
- Mulch…this will save more water than you can imagine as it helps keep the ground wet. It can even set back the first spring watering significantly (in central CA I often didn’t start watering established plants until June).
- Realize that established plants (1-2 years old) are much more forgiving than newly planted plants. Be wiling to babysit your new plants a bit, even if they are drought tolerant…and use your moisture meter. This article has a great discussion on watering drought tolerant plants.
- Trees need to be watered to 3-4′ deep, this requires a slow drip, typically overnight. But pending on the tree, this may only need to be done once a month, or less for drought tolerant trees (which actually need watering in the dry of winter, and may die if over watered in the heat of summer).
- Shrubs should be watered to ~2′ deep, again, a slow drip is ideal. For many shrubs this only needs to happen once a week, for drought tolerant shrubs you may get away with only once a month.
- See the grass section for watering tips, but 12-14″ is ideal.
Grass Options
For years Bermuda grass has dominated as the low water alternative. Now Zoysia has been added to the list. Unfortunately, these grasses are TOO hardy, making them extremely invasive…meaning they will invade parts of your yard you don’t want them, taking over flower beds and shrubs…and even growing up through cracks in the concrete. Getting rid of these is nearly impossible and typically requires toxic chemicals…and years of battle (see where to start for more options). Below are some options I have researched. A key part to all of these options is proper watering. Too may people water just a little every day or every other day. Others water for long periods of time.,.but without a break to let the water soak in. The best way to water is in accordance with your cities timing (usually two days/week) and to cycle-soak. Cycle-soak means running the water until just before it starts to run off the grass, turning it off for ~60 minutes, then turning back of until just before run off again. This should happen during when the sun is down, and as many times as need to water to a minimum depth of 12″ (use a screw driver to test by poking a 12″ screwdriver into the ground, the depth it goes into easily is the depth the water has penetrated…deep watering = deep roots = hardier grass.
Meadow Grass & Native Flower Seed for California
- Hedgerow Farms
Meadow Grass options for Central Valley are:
– Native Upland Grass Mix and Native Perennial Grass Mix, both are seed, approx. $45/lb to cover 0.25 acres
For flowers they have a great Central Valley Native Pollinator Mix - Delta Bluegrass
– Native Mow Free, available in seed and sod. Seed is ~$45/lb (covers ~300 sf) or $1.60/sf for sod (free delivery over 1,000 sf)
Call or check websites for updated pricing and estimates for your exact square footage
Lawn Grasses
- Both meadow grass sites above can hep you choose options that will work here
- Pearl’s Premium
I came across this while researching grass alternatives. The article that led to finding it can be read here - Tall Fescue mixes can be good options when watered properly and can typically be found at nurseries or even big box stores
- Other options are outlined in this article and include bent grass (which Delta Bluegrass sells) and UC Verde Buffalo grass


Septic Safe Planting
For those of use who live in the country, knowing where your septic is and how to properly plant round it can save tens of thousands of dollars down the road. Coming soon is a plant list and other info.

Who’s Who
For some, having a design is like having a book they will never read. While I can help with some aspects, I will soon be posting a list of subcontractors that have been recommended that can do the heavy lifting, e.g concrete, shade, bbqs.